A word on visuals: Two photo tricks
Scientific presentations can profit from cinematographic storytelling, specially from those effects that direct the eye gaze. In this post I present the vignetting and background blur effects. They are quick to prepare and yield great results.
If you are including photographs in your presentation there are two classic tricks to help to direct the attention of the view to exactly what you what. The tricks are called vignetting and background blur. You might already know what I'm talking about. The tricks are used in movies like The Graduate (1967) and Citizen Kane. To show the first effect I created an artificial image using Inkscape.
- Original

- Vignette. According to Wikipedia vignetting is a reduction of an image's brightness or saturation at the periphery compared to the image center. Vignetting helps directing the viewer into your slide. You can create this effect using the GIMP of Photoshop. Basically you just make an oval selection around the object of interest. Invert the selection. Turn on the quick mask. Apply a Gaussian blur. Turn off the quick mask. Finally, slide the output level on the Levels menu towards the left. If this was too fast google for vignette tutorial gimp or photoshop.

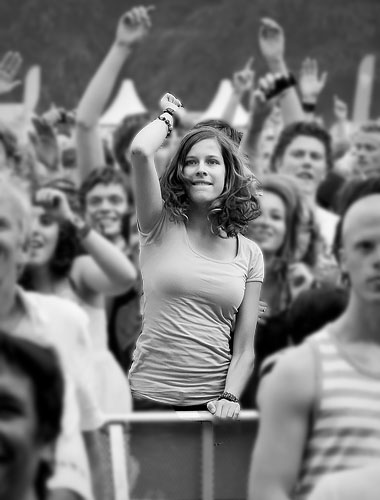
- Background blur. This effect goes by different names such as shallow focus, depth of field or background blur. Check out the example below. Although the picture already has the dancing girl as main element, the picture can be improved by making the girl pop out of the background by blurring it. This effect is even simpler to get in photoshop or GIMP than vignetting. First, select your object. Then inverse the selection and apply a Gaussian blur.
 |
| Girl dancing. Image pulled from Flickr |
 |
| Example of background blur |


Comments
Post a Comment