Posts

Showing posts with the label tutorial

How to add rounded corners to any shape in Inkscape
Image
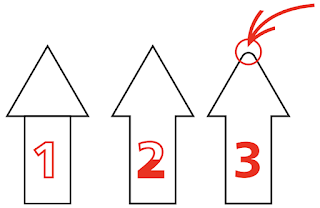
  Heads-up! Directly inserting svg files in Keynote is now possible, albeit limited editing possibilities.  One of the things I struggled for years was to create rounded corners in shapes, until yesterday when I, thanks to Nick Sapurito's Inkscape Master Class,  learned about the Live Path Effect (LPE) called Corners. I have known about LPE for years, but always ignored until two months ago, when I had to bend text. Anyhow… Quick tutorial This is my starting point, an arrow with sharp edges: 0. Select the shape you want to apply the arounded corners. 1. Open the Live Path Effects dialog  by going to the Path Menu > Path Effects … Don't ask me why people write and talked about Live Path Effects, but in inkspace is simply called Path Effects. Also note it has a direct shortcut. 2. This is inconvential, but I searched for the effect instead of directly clicking on it, just to keep you  focused: 3. As the next figure shows, this effect allows to add (or not) a ...

Use presenter notes in Keynote without an external monitor

Image
 If you use Apple Keynote' presenter notes you might not know that you don't need an 2nd monitor to use them. Since Apple broke using an external display in macos 11.6.1 on my iMac 2015,  I had to look for an alternative to use Zoom and presenter notes in a single Monitor. The solution comes in the form of using Keynote's In Window Play and sharing only the Keynote Window in Zoom. I'll only address the Keynote part in this post. So you have a presentation with presenter notes  If you look at Menu > Play, it might look like this For me, this has always been the standard configuration. If instead you choose In Window and press Play Keynore will render this   If no presenter notes are shown, click on Show Presenter Display in Window.

How to make a comic dot background in Gimp

Image
In the previous post I showed some examples that used this typee of "comic book dots". The technique is  called halftones. In this post I want to show how to do this background using Gimp 2.10. Thee background is made of three parts: A grayscale gradient, halftones, and the coloring.   The halftones are the result of applying the distort filter newsprint in Gimp. Note that the application of this filter on either white (#FFFFFF) or black (#000000) does not yield any dots. The resulting dots of a gradient between light greys are back on white background. Below thee gradient goes from 100% white to 85% white: Note the offset and the starting point at the middle of the image. Now for the halftones. The default on my Gimp is lines, so I had to change it to circles. Also note that the dot size is worth playing with: And finally the coloring. This is done by a second layer with the layer mode set to Addition. All this gives this: If you want a stronger dots make the gradient ru...

How to animate text hightlighting in Keynote

Image
 Following the previous posts on text highlighting and drop caps, this one is about animating highlighed text moving the hassle from animation synchonization to a "advanced" use of the color gradient.  What I want to achieve is to reveal the highlighted text as the text is read. Let's dive in: Advanced gradient fill If the Object List is not already open, do it  by navigating to the View  > Show Object List or press Option + Command + L. We are starting with a text field and 4 rectangles. The latter have all the same size and color. They have all also been aligned to the left. Now, rearrange them to this order. Make should that the b.'s have the same color of the background: Next, select the t.top shape and applied a advanced color fill with the same color of the t.bottom shape. Set the transparency of the left color to 0%: And set the transparency of the right color to 100%: Now add 2 new color "stops": One with should be a copy of left color and the oth...

How to create a drop cap in Keynote

Image
  Following the last posts on text. I want to talk about drop caps. You have seen them in magazines and ancient books. They're cool and they can be done in Keynote but there is a caveat. If need to put your text in a shape and getting to the settings in to that simple. Let's take a look:  Next, put your text inside the shape and format it as you want. Then select the Initial letter and open the format side panel (#1): All the way down you'll find the drop cap (#4). It is not intuitive to get there. So note that it in under Text(#2) and Style(#3). If you don't see it, double check that the initial letter is selected. Now, you can apply it (#2): I have chosen a predefined drop cap style (#3) and modified the font (#4a) and its color ($4b).  This is the end result:  

How to highlight text in screenshots

Image
Before After Sometimes scientific presentations include screeshots and text is highlighted by drawing box around it and either filling it it blank or a semi transparent fill. In fact, yesterday I was just about to do that but then I decided to open Gimp and  apply some layering techniq ue . The results? For black text the natural option is the Addition Layer. For the blue text HSL Color works best. Here is a quick run down. 1. File > Create > From Clipboard 2. If the layers dialog isn't showing press Ctrl + L  or in Mac Command + L.  3. Create a new transparent layer Shift + Ctrl + N or in Mac Shift + Command + N. 4. If the toolbox dialog isn't showing press Ctrl +  B and click on the rectangular select tool or press R. 5. Make sure the newly create layer is selected. In it draw a box over the text you want to highlight. You don't  need to be so precise. 6. Open the color picker dialog and select the highligh color. After you are happy with your selectio...

How to edit shapes in Keynote 7

Image
Keynote offers very good tools to do complex shapes, and just no rectangles, circles, triangles and so on: Complex shapes are not only done using the "Draw With Pen" tool, but also by reshaping basic shapes and combining them using boolean operations. Note I'll be using Keynote 7.1.1. Boolean Operations The boolean operations offer by Keynote are Unite, Subtract, Intersect, and Exclude: First things first, the boolean operations are found in Keynote on the Format panel, under the Arrange tab. The operations are only shown when two or more shapes are selected , like shown in the figure above. With the first three operations one can quickly make a shape like this: With the fourth operation one can punch a hole in a figure: Editing Shapes In this tutorial, we are going to go for this diagram 1. Add a square and make it editable. Right Click on the selected shape and Left Click  on Make Editable. 2. Add a new vertex by placing the mouse pointer on ...