A good title visual makes a good first impression
A good title slide helps you and your audience. In this post I give an example of how to build such title slide using Gimp.
After you have worked on the content of your talk, practiced it and got feedback, you might want to go for a great title slide. This slide helps the audience anticipate what kind of talk they will be listening to. The title of the talk, its author(s), and its(their) affiliation(s) are more than enough. Think about it, your audience how the name and date of the conference they are attending, why would you want to remind them about it? For me, the title of the talk is enough. Restraining to that amount of information helps to work on a great visual.
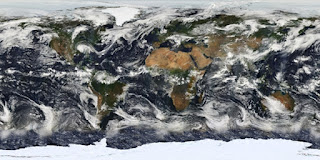
So here is an example. The image below is from Wikipedia's Picture Of The Day (POTD) collection.
 |
| Wikipedia's POTD January 1, 2012 |
Let me walk you through how I got from this POTD to this title slide. First, download the image in its full resolution. Working with images in full resolution will allow you to remain in full page mode in case you have to crop the image. Down-scaling an image always gives a good result, whereas up-scaling is not a good practice. Once you have the image on your hard drive, the main steps to get this result are enhance contrast, draw a grid and apply a vignette.
Step 1. Enhance contrast. To enhance the contrast I made a copy of the original image and turned it black-and-white and change the blend mode to "overlay" and reduce its opacity.
- On Gimp, duplicate the original image by pressing Shift+Ctrl+D.
- Click on the Color menu. Choose Desaturate.
- Pick the Lightness mode.
- In case the layers dialog is not visible open it by pressing Ctrl+L and click on the Mode drop-down menu and set the opacity to approximately 25 or choose the value you find most appropriate.
- Open a new slide by press Shift+Ctrl+N and set it to Transparency.
- Go to the Filters menu → Render → Pattern → Grid
3. Click on the color bar underneath Horizontal and with pick a white color from the image using
the color picker. I chose 3ffdff.
4. Set the spacing to 64, the width to 1, the offset to 0, and click on OK.
5. Repeat step 4 but set the spacing to 256 and the width to 2. Your image should like this.

6. I think the grid is too strong and I want to make some of it transparent. For that select the Lasso tool by press F and making a selection around the area of interest.
7. Feather the selection by clicking on the Selection menu → Feather. Apply a high number like 200. You won't notice the feathering.
8. Invert the selection by pressing Ctrl+I.
9. We want to make this selection transparent. By the way, the feathering will give the image a nice smooth fading out of the grid. To make the selection transparent, apply a layer mask give go to the Layer menu → Mask → Add Layer Mask and accept.
10. Make sure that the foreground color is black. That is, make sure that the toolbox is visible (Ctrl+B if not) and press D.
11. Get the Fill/Bucket tool (Shift+B), make sure the "Fill Whole Selection" in the tool's dialog and click on the selection. You should get a layer mask looking something like this:

To see the layer mask go to Layer menu → Mask → Show Layer Mask. The complete white zone will be 100% visible, the 100% black completely transparent and the grey zone semitransparent. You created the grey zone using the feathering... If you made the layer mask visible, make invisible again to continue working.
12. We are almost there. If the grid is too dominant, reduce the grid's layer opacity (see the screenshot above). Now your image should look like is:

If you are satisfied with the result or if you are running out of energy or time. You can skip the next step.
Step 3. Vignetting. In this step I go a bit faster as all of the keyboard combinations are given in steps 1 and 2.
- Make a new transparent layer.
- With the lasso tool make a selection that is inside the selection of step 2. The idea here is that the grid will be smoothly darkened.
- Feather the selection by 100 pixels.
- Invert the selection.
- Fill the selection with black.
- Set the layer's Mode to Multiply and opacity to approximately 35. At full opacity, the vignette only looks like is:
After all of this, this is my result:
That's the visual. Now you can create the slide in Gimp or your slideware of preference. Here are a couple of hints to get the image into that great first slide:
- Scale the image to match the width of your other slides. I wrote about up-scaling images here, but the process to down-scale is the same. That the benefit of working with full resolution images.
- Move the image to the top of the slide and match the rest of the slides background using the grey at the button of the image. Click here to see how.
- If you can, choose a font that as straight lines as 90° angle. I used (again) Rockwell.


Comments
Post a Comment